| Pin Routers by Jim Adams |
| A pin router is a routing machine in which
the cutter is guided by a stationary steel pin. Before the development of CNC, pin routers
were used extensively in industry as template followers and duplicating machines. I use
a simplified, home-built version of a pin router for rounding over the edges of small
intarsia parts. This set up offers major advantages over other roundover methods. One is
that the pin, being very small, can guide the bit into inside curves and sawtooth patterns
where no sanding drum or bearing-piloted router bit can go. Another advantage is that the
pin, being stationary, cannot burn or damage the workpiece.
The photos show a home-built pin router and some of the cuts you can make with it. Here
are some notes on building and using these machines: |
| 1. |
For safety, the hole through which the
router bit protrudes must be close to zero-clearance. A larger hole can
allow a small workpiece to tip in - a dangerous situation. |
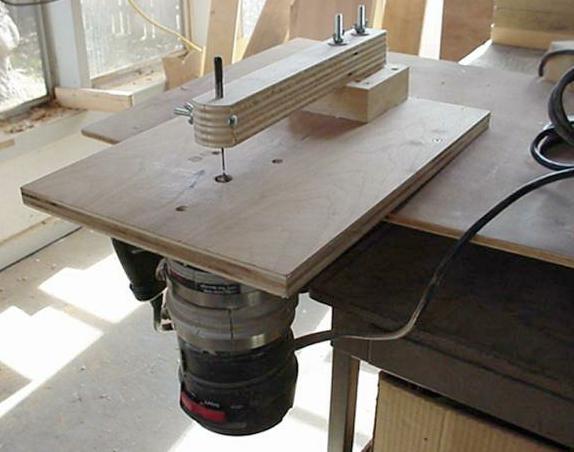 Home-built pin router |
| 2. |
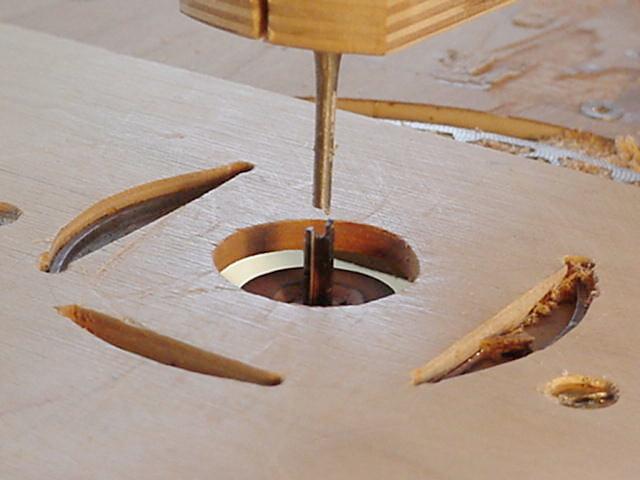
Use a full-size router, at least 3/4 hp.
The guide pin is a 1/16" pin punch. Router bits are point-cutting roundover bits. In
my work, the most useful sizes are 1/8" radius and 3/16" radius (you might have
to order them). |
| 3. |
The table and overarm have no set
dimensions. In my tables, the overarms are 1 1/2" square. Mounting blocks are 1
1/2" thick (2 x 4s). Throat depth is about a foot. Overall construction is square,
strong and rigid. The tables are mounted chest high, so you can see what you are doing. |
| 4. |
The arm is held to the mounting block by a
pair of ¼" carriage bolts with flat washers and wing nuts (see photo). To allow for
adjustment, the bolt holes through the arm are drilled oversize. A scrap of sandpaper is
glued to the mounting block between the bolts. The arm is positioned so the pin is
centered over the router bit, and the wing nuts tightened tight. The sandpaper
prevents creep. |
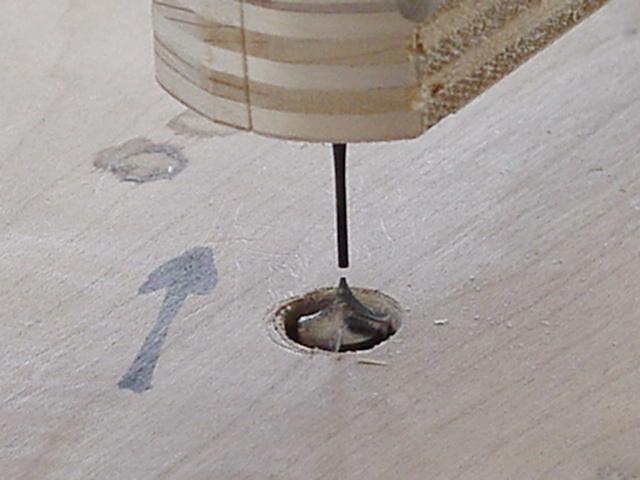 Point-cutting roundover bit. Arrow on the table
indicates feed direction. |
| 5. |
To make an inside cut requires several
steps. First, turn the router off. Raise the pin. Place the workpiece over the
router bit. Lower the pin. Start the router and make the cut. Turn the router off.
When the bit has come to a complete stop, raise the pin and remove the workpiece. |
| 6. |
Finally, pin routers are useful for
undercutting backboards. I use a 1/16" pin and a 1/8" straight cut bit (see
photo). When making multiple copies of smaller projects, I glue the projects to luan like
so many cookies on a cookie sheet. When the glue has dried I rough-saw away most of the
scrap, then finish up on the pin router. Quality is excellent, though the process is not
as fast as one would wish. |
 Hand position for a small part. The part is rotated
counter-clockwise against the pin. |
|
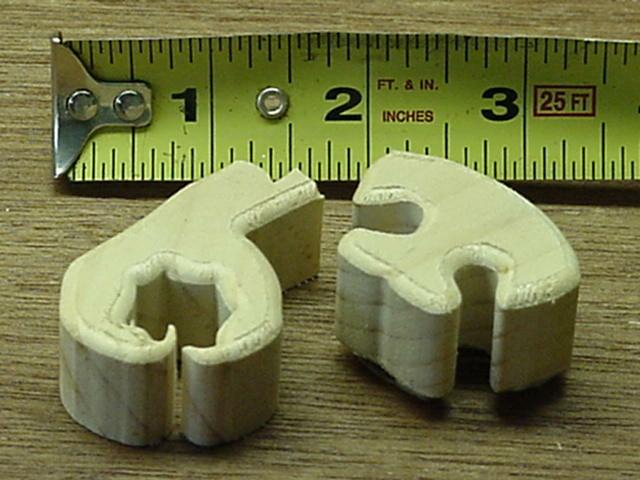 These parts (a wolf's nose and an eagle's foot) were
rounded over on a 1/8" radius pin router. |
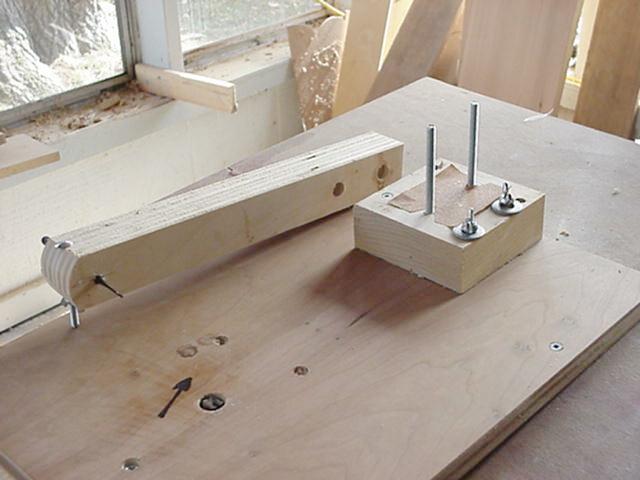 Assembly detail. Sandpaper prevents the arm from
creeping. |
|
 Pin router set up for undercutting backboards. The pin is
1/16", the bit 1/8". |
|